Mount Rinjani – The Complete Trekking Guide
MOUNT RINJANI UPDATE! The trek will be partially opened for the 2-Day Trek from Senaru Gate to the Crater rim from the First of May (01/05/2019). After that, a survey will be carried out to ensure further safety of the trek. Please contact Hajar Trekking for more information about the trek!
Are you thinking about going to Indonesia? More precisely to Lombok? I bet your destination will be Gili Islands. Apparently, they're fantastic. But there is a national park in Lombok that takes half of the island: Mount Rinjani National Park.

In this complete guide to Mount Rinjani, you will find:
- Our Trek to Mount Rinjani
- 3 Days/2 Nights Trek to Mount Rinjani from Sembalum
- Day 1: From Sembalum to the Base Camp
- Day 2: Attack to the Summit, Crater Lake and the Ascent to Senaru Crater Rim
- Day 3: From Senaru Crater Rim to Senaru
- Other Trek Options for Mount Rinjani
- 2d/1N, Leaving from Sembalum
- 4d/3n, Leaving From Sembalum
- 1 day trek to Sembalum or Senaru Crater Rim
- 3d/2n, Leaving from Senaru
- Mount Rinjani: How to Get to and Prices
- Who to hire?
- Is there a way to do the trail without a guide?
- Where to Stay in Sembalum/Senaru for your Mount Rinjani Hike
- The garbage on Mount Rinjani
Our Trek to Mount Rinjani
First of all, let me start by being honest: it's hard! It is very, freaking hard! The trek to the summit of Mount Rinjani was one of the most difficult treks I have ever done to this day for a few reasons. I'll detail them in this post. But Nevertheless, the trek to Mount Rinjani is very interesting to be done. After completing it, your level of self-confidence to complete hikes (any hike!) and treks will go through the roof.

The trek to the top of Mount Rinjani is not easy by several factors. Anyone who has done enough treks or already read the post of The Owl Trek or Mount Roraima, know that I always mention that hiking/trekking is 70% psychological and 30% physical. Never ever, up to this day, have the 70% psychological been so used to complete a trek. It's a lot up and down and very long days. Everything adds up to increase the level of difficulty. I'll describe everything in this post!

Here is a breakdown of the trek to the top of Mount Rinjani and back! More trekking options later!
3 Days/2 Nights Trek to Mount Rinjani from Sembalum
We did the trek for three days and two nights, leaving from Sembalum. For those who want to see everything that Mount Rinjani has to offer, this is the itinerary I recommend. There are the options of 2d/1n and 4d/3n (detailed later). With the first option, it only offers the summit and the group returns to the starting point. In the second, the trekking days are shorter, giving you more time to explore the surroundings, but the trek gets more expensive and with more idle time. The three days and two nights trek has provided us with everything there is to see in Mount Rinjani, and we have kept ourselves very busy for the whole day.

Day 1: From Sembalum to the Base Camp
Like most treks, ours began in the town of Sembalum. The altitude of the town of Sembalum is 1100m. Before you reach the entrance of the trek, your guide will take you to sign the control book, to know where and with whom you are.
The trek begins relatively flat, with little elevation. This part of the trek becomes difficult because there are no trees or shade. The vegetation at the beginning of the trail is dominated by the grassland, so it is very important to use enough sunscreen. It can get really hot, believe me! Being like me, as pale as a ghost, yeah, it gets freaking difficult!

One hour after the start of the trek and passing through POS 1 (a resting post), you will arrive at POS 2 where lunch is served. Many find it strange because lunch is served quite early, at around 10:30am, but it is important, because the trail from POS 2 gets quite steep and with few points for lunch to be cooked and served. The lunch served is amazing, with enough carbohydrate and protein, important for the next stretch of the trail.
Hint at this point: There will be a huge temptation to gorge yourself with that delicious food (they'll serve a lot of food)! Try to eat just to quench your hunger. This will give you enough energy to carry on and make you feel a little less “like you want to die” along the way. With lunch finished and after some time for digestion, the ascent part of the trek begins. From POS 2, the whole trail is uphill, and it can get quite steep at certain points.

Start of the Ascent of Mount Rinjani
The vegetation of the trail begins to close a little, which gives you certain relief, but if you go during the dry season of June/July/August, the dust is enough to annoy you. A buff or scarf to cover the mouth and the nose will help a lot!
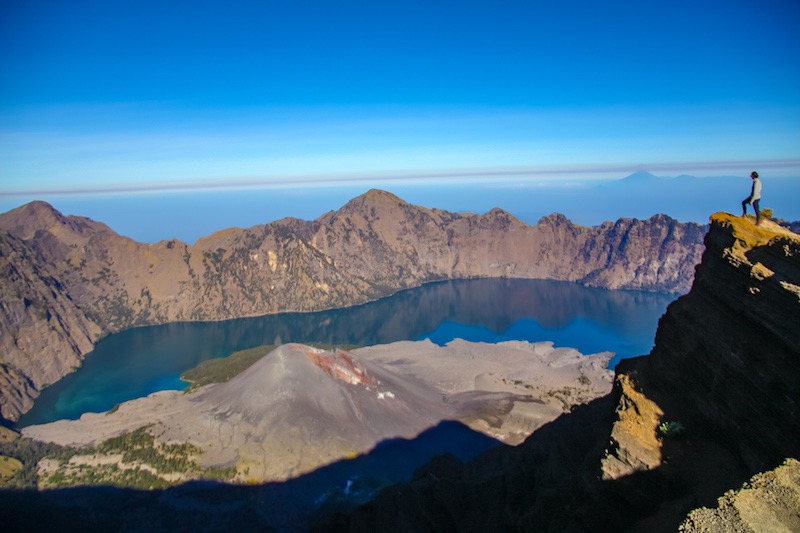
After 3 hours of hiking uphill, you will finally reach the crater rim, which is the 2670m altitude. Many people make the hike to Mount Rinjani every day (hundreds in fact). The best spots are available on a first come-first served basis. It is important to take a good camping spot, closer to the beginning of the summit trail, because the queue on the next day will be long. Leave a bit earlier than other groups. This will give you a head start and guarantee a good camping spot. You will arrive a bit early, but you will have plenty to explore around the camping site. This way, you will have time to take plenty of pictures still with a clear day and enjoy the sunset from privileged positions!
Psychologically speaking, the first part of the trek is not very difficult, even though you will be climbing a little over 1500m vertically. For those who start the trek in Sembalum, the morale is still high, the energy is still at an all-time high and everything is great. So it's important, even trying to get there early, not to spend all your energy on the first day. It's tempting to do that, so start the trail early and slow down. Believe me, you will need all the energy you can save for the next day.

Day 2: Attack to the Summit, Crater Lake and the Ascent to Senaru Crater Rim
The second day of the trek of Mount Rinjani is a killer! Honestly speaking, it wasn't easy to do it! Physical effort is huge, the way is long and we walk for a long time! In our case, it was 11 hours of pure walking, excluding the stops to drink water and eat. All the energy you saved the day before will be used on the second day.
The second day was divided into three steps:
Attack to the Summit of Mount Rinjani – First Part
The day begins the 2am, with a carb and sugar rich breakfast. Eating a lot of carbohydrates and sugar for breakfast is very important to give you the energy you need to hike to the summit. It is also important to always have with you some hyper-caloric food, like chocolate or sweet biscuits to take with you (A hint for every hike, not only to Mount Rinjani). On the way, we met people who were away from their guides and were almost giving up the climb, because they were really hungry and had no energy left. We gave them a pack of biscuits because we had brought a little too much. Our guide also had other foods. Yeah, good Samaritans over here!

The ascent to the summit begins in the dark, so having a head torch is indispensable. The beginning of the trail can get steep and with plenty of dust. Already at the beginning of the trail, many people could already feel the effects of altitude. A lot of people will be walking along with you. The pace is relatively slow, but this can be quite beneficial not to spend your energy at the very beginning. Walk slowly but surely. This first part lasts around 1 hour and it is pretty straight forward, just respect the pace of the group.
After 1 hour, the trail gets flat for another half hour. This gives you some relief and a great chance to take a rest while moving on. It's good not to speed up at this point, because the hardest part is yet to come.

Attack to the Summit of Mount Rinjani – The Final Part
The final part of the ascent is arguably the hardest. The trail is made up of loose gravel and sand. For every step taken, you'll return half. That's what makes the attack to the summit very difficult. At this point, you will be at 3400m altitude and, if you have only visited beaches up to that point, you'll feel the effects of the altitude (badly sometimes). To traverse the last 500m (326m vertical), it took us 1.5 hours! Your psyche at this point starts to speak louder and louder and it becomes very easy to give up. At that point, around 75% of oxygen (as compared to the beginning of the trek) will be at your disposal. Your body will work much harder to get energy. Eat up them chocolates!

Arrival to the Summit of Mount Rinjani
There are reasons why you try to reach the summit. The first is to overcome your own limits, the second and watch the sunrise from up there. I'd say that 60% of the people who started at around the same time as us reached the summit in time to see the sunrise. As I said before, the trek is not easy! Watching the sunrise of a place so hard to get to is so worth it! A reward for not giving up during the whole ascent!
Remember, you're going up a mountain (incl. Mount Rinjani), so it's important to keep in mind that weather up there is unpredictable. It may be the most beautiful day ever, or it can be overcast. At this point, it looks like we're coming to the end of the first day, right? But that's only the first three hours!
Downhill from the Summit of Mount Rinjani
Through all the difficulty of the climb, it's worth mentioning the descent! It's so nice to go down! It is almost “skiing” on loose rocks. It took us 3 hours to hike up, but we came down in a little less than 2 hours. It's worth taking your time in your descend. There is a ton of photo opportunities along the way! Views of the lake, the active volcano in the middle of the crater of Mount Rinjani, etc. Take a whole bunch of photos, but remember that the day is just beginning!
From the Base Camp to the Crater Lake
After descending from the summit of Mount Rinjani, taking some water and having a more reinforced breakfast, it is time to continue to the crater lake. That part of the trail is almost all downhill, a very steep descent. The altitude of the lake is 2060m, meaning a 600m descent. It becomes very easy to cause knee damage or sprained ankles. You can't be too careful at that point.
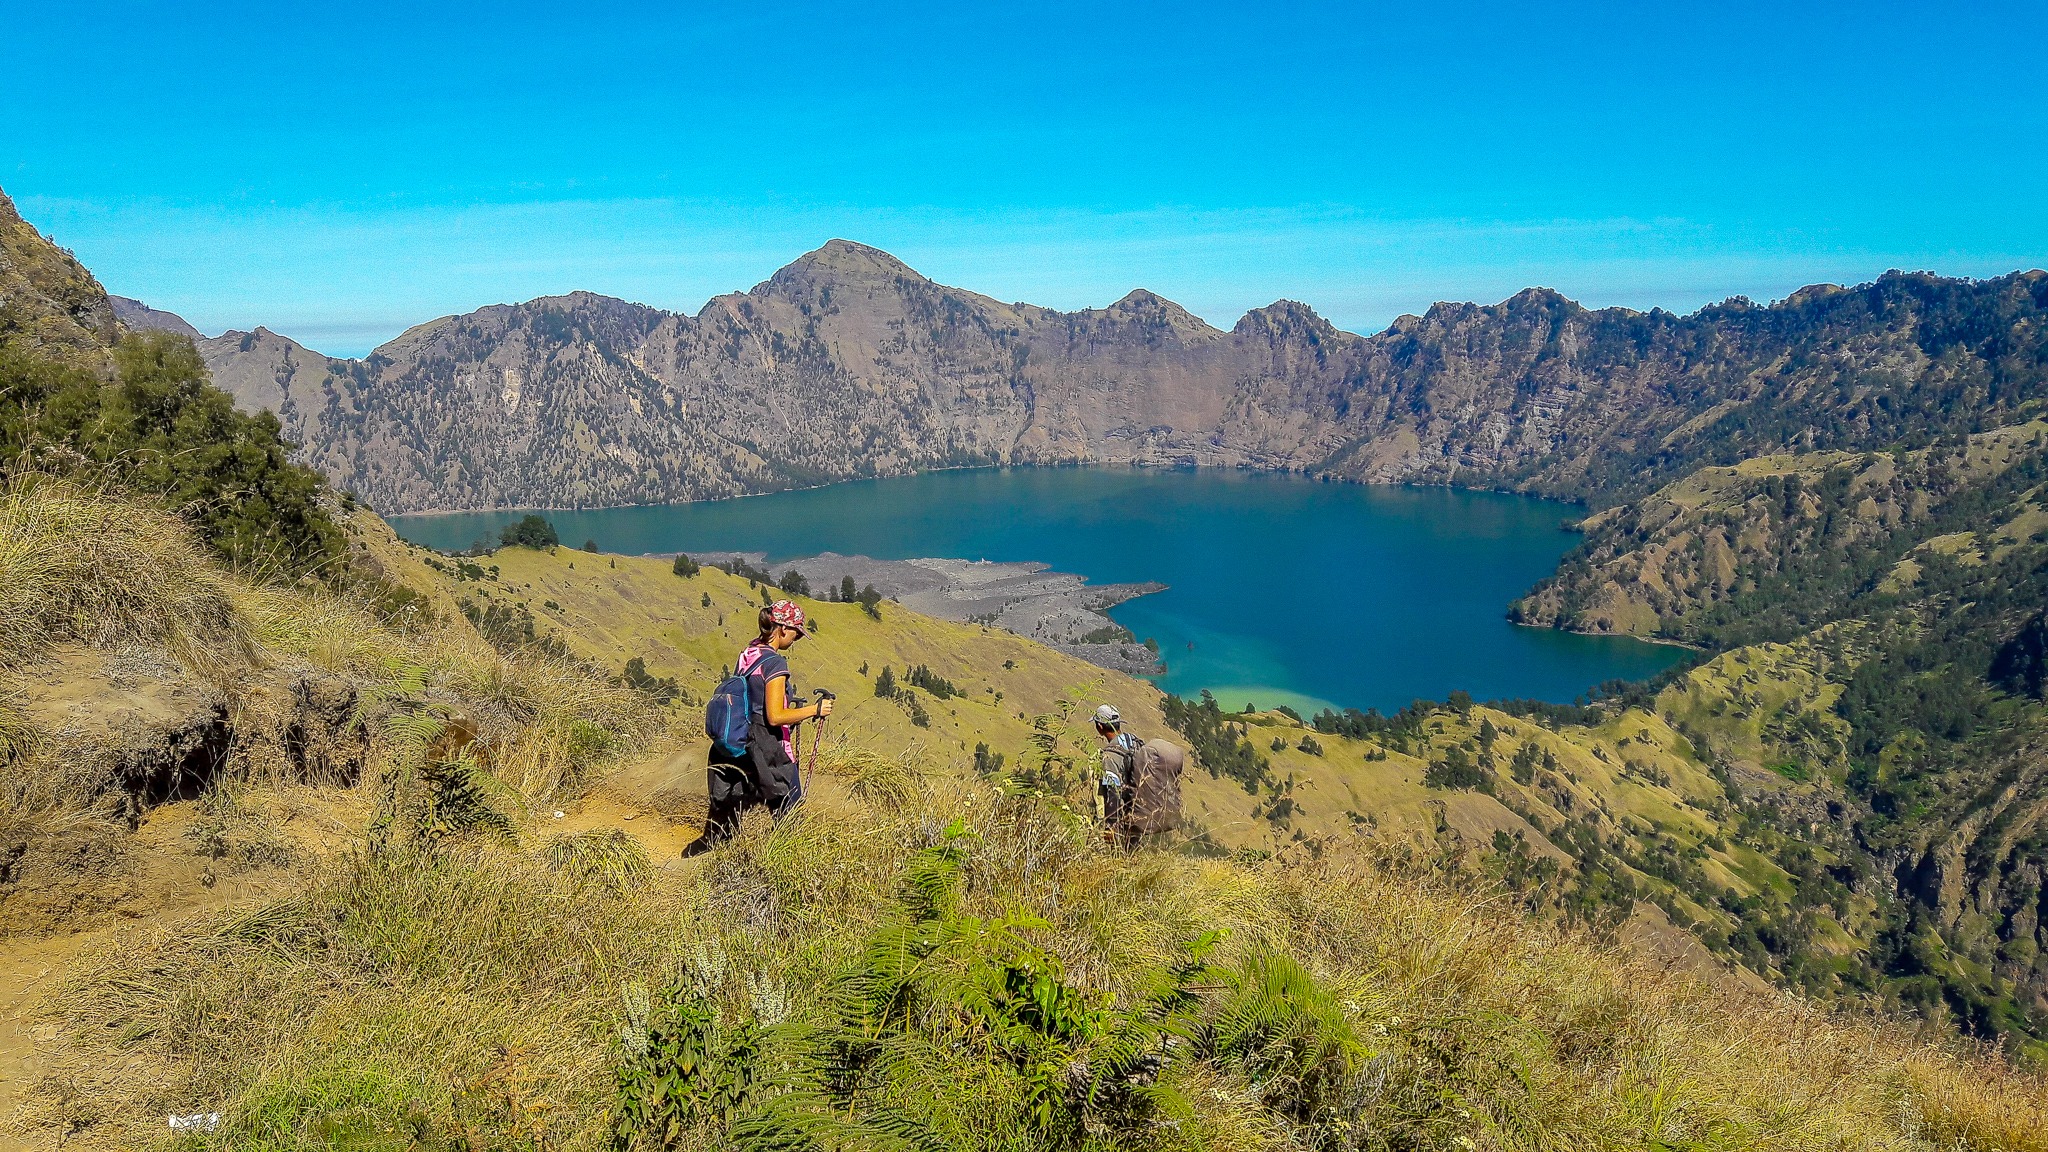
After the first hour of descent from the summit of Mount Rinjani, the trail becomes a little flatter, with some ups and downs, but all relatively easy. After the end of the descent, the walk lasts for about another 2 hours. This part of the trail has wonderful views of the lake, which helps to increase morale. We begin to imagine how beautiful it must be to see the lake up close.
The Crater Lake of Mount Rinjani
The Crater Lake was formed after a large eruption happened thousands of years ago, which decreased the height of Mount Rinjani by more than 1000 vertical metres. It was one of the biggest eruptions of a volcano on Earth. This spawned a huge crater and, due to the accumulation of water, a lake was created. As time went by and the volcano was still active, a small volcano was (still is) formed in the middle of the lake of Mount Rinjani. Smoke of its activity is seen at various points of the trek. It's a very interesting thing to see!

Unfortunately, arriving at Crater Lake, I was disappointed. It's pretty dirty. I'll comment about this in more detail at the end of the post. But even so, you can swim and relax a little, after all, it's not every day you can say that you swam in a lake inside an active volcano, right?
Hot Springs
Not far from where we left our things by the lake, there is a Hot Spring to relax a little! At this point on the trail, we've been walking for almost 8 hours. Soaking in the spa, not thinking about much, is brilliant! It relaxes your muscles and makes you ready to face the rest of the day. These are one of the advantages of hiking up an active volcano: There will always be hot water for you to take a little bath!

After relaxation, we have lunch by the lake and move on.
From the Crater Lake to Senaru Crater Rim
From that point, there are three more trekking hours ahead. Reverse Morphy’s Law now… as we went down, we have to climb it back up. From the lake to the rim, we need to hike 700 vertical metres, with high steps (huge boulders) on the way. We walk along the shores of the lake at the beginning and then the ascent begins again. In this stretch of the trail, usually covered by some trees and taller grass, energy begins to run out. Our steps become closer together and the fog covers the end-point, so you can't see if it's close or not, and that’s horrible! So, you have to embrace the fact that it gets closer after each step and you will rest when you get there.

After more 3 hours of ascent, we reached the edge of Senaru and set up camp already on the way to leave. We arrived 1 hour before sunset, another spectacle to see from above.
Day 3: From Senaru Crater Rim to Senaru
On the last day, the trail is quite pleasant. For the first time in I don't know how long, we woke up the 6am! It did us a lot of good to face the last stretch of the trail. Again, this part of the trail is just downhill, covered by forest, making it cool. The estimated time to complete this part of the trail was 5 hours, including stopping for lunch. We did it in 4 hours. The descent is not as steep, easy to complete, but after the last two days, easy is a very relative term. Even though it's an easy part, descents are pretty good for accidents. There's a lot of dust and loose soil on the ground, so it's pretty easy to slip.

We reached the rendezvous point, and after we sat down and felt like our mission was accomplished, we carried on to our next destination.

Other Trek Options for Mount Rinjani
There are several trekking options for Mount Rinjani. Here are some options:
2d/1n, Leaving from Sembalum
With this option, the first day is the same as that of the 3d/2n. On the second day, after the attack to the summit, you return the same way you went, back to Sembalum. This is a great option for how is on a budget or just short on time. You can still have a great experience! If you are a fantastic hiker, this is the best option where you can get more money for your buck in Mount Rinjani!
4d/3n, Leaving From Sembalum
This option is identical to the trek of 3d/2n, but with the second day broken in two. Arriving at the lake, instead of carrying on to the Crater Rim, you camp there. On the third day, there's a 2-3-hour hike and that's it. You'd have plenty of free time to explore the surroundings. This is a great option if you are travelling with youngsters to Mount Rinjani.

1 day trek to Sembalum or Senaru Crater Rim
In this option, the trek leads to either crater rims. There are options to start at Senaru or Sembalum. The sights are beautiful. Starting from Senaru is longer than Sembalum. You leave in the morning, check out the views and return. It is worthwhile to see what Mount Rinjani has to offer. Also to leave you a bit more tempted to attempt the summit in the future!
3d/2n, Leaving from Senaru
There is the option to do the opposite of the trek we did and start at Senaru. The trail begins with a long ascent, the second day with a very strong descent and ascent and, on the third day, with the attack to the summit. According to the guides, the percentage of people reaching the summit by this route is lower, as the attack takes place on the third day after your energy and morale are quite low. So, do consider this when trekking up to Mount Rinjani.

Mount Rinjani: How to Get to and Prices
Both towns are at least 1 hours from any port. There are a few different ways to get to either of them, depending on your choice. Depending on the agency you hire, the trip to Senaru or Sembalum will be included in the price of the trek. If the transfer is not included in the price, there are some ways to get to Senaru or Sembalum, leaving the ports of Pringgabaya, Bangsal or Lombok airport.
Taxi
Taxi is a very convenient way to go from the ports to the towns. The cost will be high and can reach up to IDR800mil (R$200) from the airport and IDR400mil (R$100) from the ports.
Grab or Go-Tek
Grab is the app that bought the Uber in Southeast Asia. It works well in Lombok and can be quite economical. The value of the Grab from the airport to Senaru (farther, then more expensive) and Sembalum can reach IDR500mil (R$130) and IDR250mil (R$65), respectively.
Go-Tek is an app to order motorbike/scooters instead of taxi. They take backpackers with big backpacks and a small bag without any problem. It is much cheaper, around IDR200mil from the airport (but due to the distance, they might not accept the call, as it is a 3hr trip!). From the ports, the value can come to be around IDR150mil (R$40).
Hitchhiking
Hitchhiking can be easy, too, in case you're not in a hurry. There are many people going to and from Sembalum/Senaru. It may take a long time to get to one of the two towns, but it is a possibility for those who have time and do not want to spend too much.

Who to hire?
There are many companies that offer the trek to Mount Rinjani. Prices and conditions vary greatly, so you have to keep in mind the style of trek you want to do. The two main ways to hire the trek are:
Trekking in a small group
There are companies that offer to do individual tours or in small groups, only with people who are travelling together. We hired one of these companies, Rinjani trekking Planner – Hajar Trekking. The whole trip was great, everything went very well and we had no problems at all. If anything happened, our guide Uci was always with us. This is a company that we recommend for several reasons:
Advantages of Going on a Small Group – (Hajar Trekking)
- They only take small groups. This facilitates the logistics of the trek and it is easier to accommodate the preferences of individuals;
- They take all the rubbish back with them, leaving nothing behind;
- They offer food for the style of the trek, greatly helping to complete the trek;
- The equipment, such as tents and sleeping bags, are of great quality as it is really cold up there… believe me;
- The guides and porters are well paid (these guys work a lot!);
- The owner of the company, Hajar, is very experienced and planned the trek to optimise the success to the summit. Not everyone is able to get to the Summit;
- The guide is with you at all times, in case something goes wrong;
- The company will pick you up wherever you are in Lombok.
Disadvantage of hiring small groups
- It doesn't fit in everyone's pocket. The price can come to US$250 per person;
Trekking in larger groups
During our trek, we met friends we had met during our trip around Indonesia. They hired a company that closes deals with large groups (up to 25 people). There are advantages and disadvantages also in going in large groups. From the conversations I had with those who were in large groups in the camp, some things in common arose between interviews.
Advantages in hiring large groups
- It's cheap. But the service corresponds to the price.
Disadvantages in hiring large groups
- Many large group’s porters left the trash behind;
- There might not be enough food on the trek. Planning for large groups becomes more difficult. We shared our food with a group that was passing us (and also near the summit);
- You may have to share a tent with someone you don't know. This may not be a problem for many (nor for me), but this may be a problem for others;
- Some tents were mended. Whether you are camping in a cold place or rainy season, any gap where wind and water can enter is not welcome;
- Cheap sleeping bags. According to our friends, some sleeping bags could not withstand the temperature at night;
- Given the price of the trek, the remuneration of the guide and porters is proportional (low);
- Only one guide takes the whole group. This means that, rarely, the guide will be with you during the trek if something goes wrong;
Take these aspects into consideration when hiring a trek to Mount Rinjani. Sometimes cheap can become very expensive!

Is there a way to do the trail without a guide?
We asked ourselves that very question when we decided to go to Mount Rinjani and, to be quite honest, we almost did it by ourselves. The simplest answer is yes, you can do the trek without a guide. There are a few things to keep in mind if you decide to go without a guide to Mount Rinjani. NOTE: After the 2018 Earthquake, I would strongly discourage you to go to Mount Rinjani without a guide! For an account of doing a trek yourself to the base camp and back, check out this post!
Going alone, without guide or porters is possible, but requires a huge effort and a little higher physical conditioning, which is not for many. Here are some tips if you decide to venture out and go to Mount Rinjani alone:

Decide the route and the destination
Is it easier/cheaper for you to get out of Senaru? From Sembalum? Do you want to go to the summit or is the crater rim enough? All these are things to take into consideration as you will (or not) have to carry your tent and sleeping bag, consider the amount of food etc.
Going to the summit?
It's pretty hard to get lost. There's always people coming and going, so when in doubt, just ask. Going to the summit means you're going to have to start in Sembalum and spend at least one night at base camp. You will not take the tent and the sleeping bag to the summit. This also means leaving the tent assembled with all your belongings at the base camp, and climb only with the essentials (water and food).
All the tents and the porters will be at the base camp, so things won't be left alone. A good tip would be to make friends soon after your arrival with whoever is near your tent. The porters will be able to take a look at your stuff for you. GIve them a tip after, of course!
Going to the Crater Rim?
Going to the rim will give the option to spend a night up there or not. If you decide not to spend the night, just go up, chill a bit and come down later. I recommend, however, to spend the night, so you don’t descend in the dark.
Going to the lake of Mount Rinjani?
That means loading tent, sleeping bag and plenty of food. You’d have to carry around 20-25kg on your back. If you're used to hiking with enough weight on your back, go ahead!
Above all, be conscious!
If you are not accustomed to hiking or trekking and the trek of Mount Rinjani is one of your first, do not go without a guide! Never! The trek of Mount Rinjani, as I have emphasised, is not easy! If you're not used to it, something can happen and you have no one to help you. Be conscious about this!

Where to Stay in Sembalum/Senaru for your Mount Rinjani Hike
There are many options of where to stay in Sembalum/Senaru. Here is a list of the best places to stay in either towns:
Sembalum: Due to the Earthquake in 2018, most places to stay near the waterfalls in Sembalum are still being rebuit. Here are other options for you to stay in the meantime. Pick-up and drop-off will be included with your package!
- Sembalun Homestay
- Radiya Guesthouse
- Sembalun Kita Cottage
- Bale Sembahulun Cottages & Tend
- Rinjani Garden
Senaru:
For more things to do in Lombok after your trek to Mount Rinjani, check this out!
The garbage on Mount Rinjani
The garbage situation on Mount Rinjani and Indonesia is getting worse every day. Throwing organic waste away is a common act that we all do from time to time. On Mount Rinjani, this happens in large volumes (huge actually). With these volumes and the frequency in which the garbage is thrown away, there is no time for them to decompose. That makes them accumulate. In addition to the leftover food, many spots on Mount Rinjani became an open-air bathroom, with toilet paper and wet wipes everywhere. It is a bit depressing for tourists who go there (tourists actually contribute a lot this kind of waste, of course) because the place is so beautiful! In addition to organic waste, including human feces, the amount of plastic left behind is absurd.

The National Park charges a very high fee per day for trekker, but I don't know exactly where that money is being spent, to be quite honest. It costs IDR150mil per day, per person. There are hundreds of people coming and going every day to and from the park. According to some reports, the garbage has already been a problem since 2014. Soon, many people will not go to Mount Rinjani, because the situation will become unbearable (it already is a bit).

Knowing this, only hire companies that return with the trash and dispose of in a proper manner, as just like Hajar Trekking does. If you see someone throwing litter around, notify your guide! They'll figure out a way to get the attention of who's littering that wonderful place!

What are the Benefits of Hiking up Mount Rinjani?
Trekking, hiking or walking up Mount Rinjani or any other trail you might find along your way is ultra beneficial. According to Collective Evolution, hiking changes our brain, as illustrated in the infographic below. All of this based on scientific data from very reputable Universities around the world. See the link above for more.
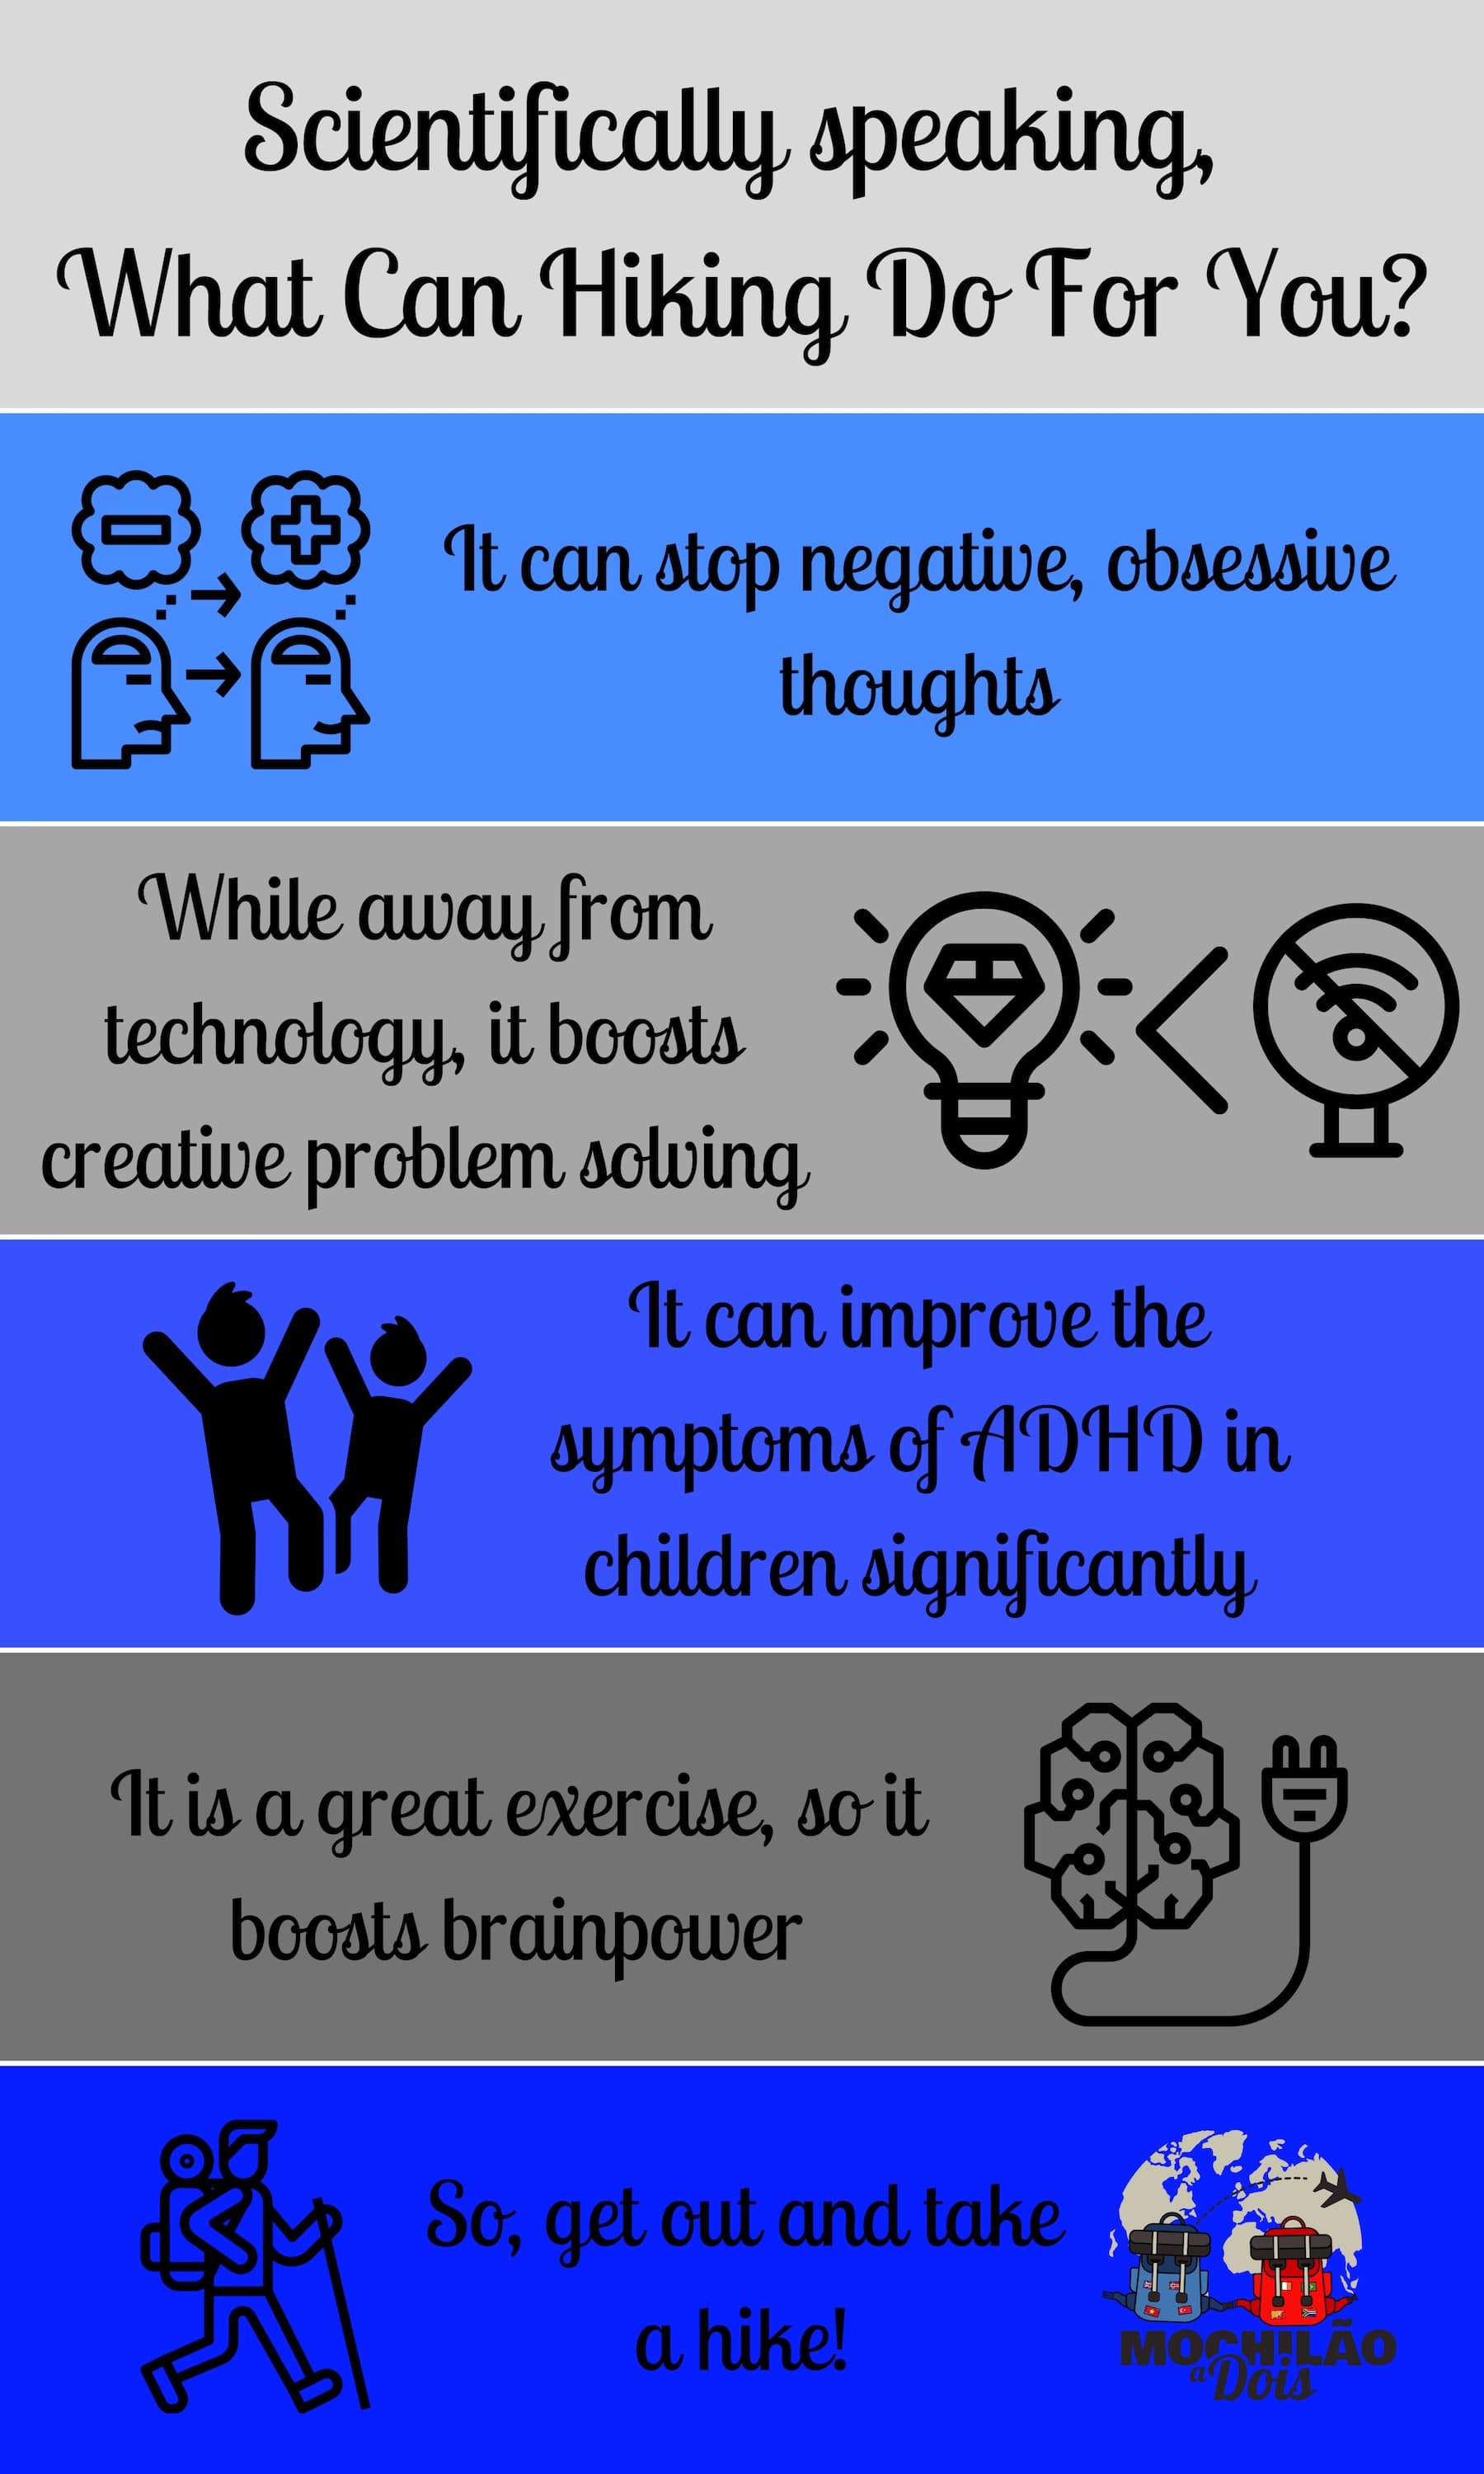
So, if it is so beneficial, contact Hajar Trekking, get out and take a hike!
Mochilão a Dois received a discount worth the price of the trek. This has not influenced the writer in any way on his opinions about his experiences.
This post on Mount Rinjani was written in memory of the victims of the earthquakes that happened in Lombok in July and August 2018.
Note 1: There are some affiliate links in this post. Please be advised that you will not pay more for using these links, but we from “Mochilão a Dois” will receive a small commission. If you like our work, please use our links and collaborate so that our blog continues to grow. We will be very happy 
Wagner studied Theoretical Physics (B.Sc) and Climatology (M.Sc) at University College Dublin, in Ireland. He has Ph.D. in Meteorology from the University of Reading the Post-Graduate Certificate in Education from the University of Oxford. Today, he teaches physics and maths in Bhutan. He has a passion for history, animation, gardening and has visited 52 countries.
You may also like:
Tugu Hotel – A 5 star experience in Bali, Indonesia
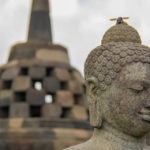
Yogyakarta: All You Need to Know to Visit The Royal City
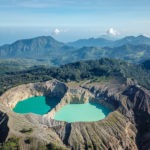
Mount Kelimutu Without a Guide? You Can Do It Yourself!
Plan your trip


Travel Insurance
O Seguro Saúde é obrigatório em muitos países! Viaje com tranquilidade e sem preocupações. Cote seu Seguro viagem com Desconto de até 10% na Seguros Promo.


Flight Tickets
Pesquise suas passagens aéreas com o Skyscanner, a melhor ferramenta para encontrar os voos mais baratos para a sua próxima viagem. Ou confira as promoções no Passagens Promo.
Pingback: 7 Unmissable Places to Visit in Bali - 7 Continents 1 Passport
Pingback: 100 Incredible Instagram Spots in Asia – My Travel Scrapbook
Pingback: Traveling to Indonesia: How to plan the itinerary (step-by-step) and how much it costs | Mochilão a Dois!
very useful post, I love it. let see what I wrote on my post about Rinjani here: http://zafigo.com/stories/zafigo-stories/best-mount-rinjani-indonesia-photos/ 🙂
Sarah
Hey Sarah, thank you so much for your comment! It would be great if we can complement each other’s post by linking them. I would be very happy to refer your post to my readers!
Pingback: Mochilão a Dois! | By boat around Komodo Islands in Indonesia: Dragons, beaches and scuba diving | Mochilão a Dois!